DystopiaGuy (talk | contribs) (→Crafting: Correct recipe, update rest to template) |
(→Uses: added missing items, new order (like in research), new recipes) |
||
| (24 intermediate revisions by 13 users not shown) | |||
| Line 1: | Line 1: | ||
{{Objects |
{{Objects |
||
|name = Large Printer |
|name = Large Printer |
||
| − | |image = |
+ | |image = Large Printer.png |
|tier = 3 |
|tier = 3 |
||
| − | |group = |
+ | |group = Item |
| − | |type = |
+ | |type = Crafting |
|recipe = 3x {{ItemLink|Compound}} |
|recipe = 3x {{ItemLink|Compound}} |
||
|crafting = Medium Printer |
|crafting = Medium Printer |
||
| − | | |
+ | |unlock = Unlocked |
}} |
}} |
||
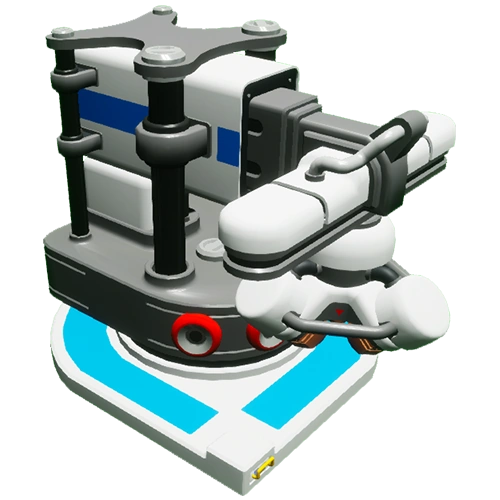
The '''Large Printer''' is one of the Tier-3 [[Modules]] in [[Astroneer]]. It is used to fabricate large and extra large [[Modules]] and [[Vehicles]]. |
The '''Large Printer''' is one of the Tier-3 [[Modules]] in [[Astroneer]]. It is used to fabricate large and extra large [[Modules]] and [[Vehicles]]. |
||
== Source == |
== Source == |
||
| − | {{ |
+ | {{Source|Medium Printer|Large Printer|Compound|amt1=3}} |
| − | {{Crafting|Large Printer|Compound|Compound|Compound|}} |
||
| − | == |
+ | == Uses == |
| + | The Large Printer has the following uses: |
||
| − | |||
| + | {| class="darktable zebra moduleTable" |
||
| − | === Platforms === |
||
| + | !Output |
||
| ⚫ | |||
| + | !Input |
||
| ⚫ | |||
| + | |- |
||
| ⚫ | |||
| + | | {{ItemLink|Shelter}} |
||
| − | |||
| + | | {{ItemLink|Silicone}} x2</br>{{ItemLink|Plastic}} x2 |
||
| − | === Modules === |
||
| + | |- |
||
| − | {{Crafting|Large Rover|Aluminum Alloy|Aluminum Alloy|Rubber|Rubber}} |
||
| + | | {{ItemLink|Auto Extractor}} |
||
| − | {{Crafting|Small Shuttle|Aluminum|Aluminum||}} |
||
| + | | {{ItemLink|Tungsten Carbide}}</br>{{ItemLink|Rubber}}</br>{{ItemLink|Steel}} x2 |
||
| − | {{Crafting|Medium Shuttle|Ceramic|Ceramic|Aluminum Alloy|Aluminum Alloy}} |
||
| + | |- |
||
| − | {{Crafting|Large Shuttle|Titanium Alloy|Titanium Alloy|Ceramic|Ceramic}} |
||
| + | | {{ItemLink|Extra Large Shredder}} |
||
| − | {{Crafting|Shelter|Silicone|Silicone|Plastic|Plastic}} |
||
| + | | {{ItemLink|Steel}} x2</br>{{ItemLink|Tungsten Carbide}} x2 |
||
| − | {{Crafting|Solar Array|Copper|Glass|Plastic|Graphene}} |
||
| + | |- |
||
| + | | {{ItemLink|Solar Array}} |
||
| + | | {{ItemLink|Graphene}}</br>{{ItemLink|Aluminum Alloy}}</br>{{ItemLink|Glass}}</br>{{ItemLink|Copper}} |
||
| + | |- |
||
| + | | {{ItemLink|XL Wind Turbine}} |
||
| + | | {{ItemLink|Graphene}}</br>{{ItemLink|Aluminum Alloy}}</br>{{ItemLink|Ceramic}}</br>{{ItemLink|Iron}} |
||
| + | |- |
||
| + | | {{ItemLink|Medium Sensor Arch}} |
||
| + | | {{ItemLink|Zinc}}</br>{{ItemLink|Quartz}} |
||
| + | |- |
||
| + | | {{ItemLink|XL Sensor Arch}} |
||
| + | | {{ItemLink|Zinc}} x2</br>{{ItemLink|Quartz}} x2 |
||
| + | |- |
||
| + | | {{ItemLink|XL Sensor Canopy}} |
||
| + | | {{ItemLink|Zinc}} x2</br>{{ItemLink|Quartz}} x2 |
||
| + | |- |
||
| + | | {{ItemLink|Large Sensor Ring}} |
||
| + | | {{ItemLink|Zinc}}</br>{{ItemLink|Quartz}} |
||
| + | |- |
||
| + | | {{ItemLink|Large Sensor Hoop A}} |
||
| + | | {{ItemLink|Zinc}}</br>{{ItemLink|Quartz}} x2 |
||
| + | |- |
||
| + | | {{ItemLink|Large Sensor Hoop B}} |
||
| + | | {{ItemLink|Zinc}} x2</br>{{ItemLink|Quartz}} |
||
| + | |- |
||
| + | | {{ItemLink|XL Sensor Hoop A}} |
||
| + | | {{ItemLink|Zinc}} x2 </br>{{ItemLink|Quartz}} x2 |
||
| + | |- |
||
| + | | {{ItemLink|XL Sensor Hoop B}} |
||
| + | | {{ItemLink|Zinc}} x3</br>{{ItemLink|Quartz}} |
||
| + | |- |
||
| ⚫ | |||
| + | | {{ItemLink|Ceramic}} x2</br>{{ItemLink|Iron}} x2 |
||
| + | |- |
||
| ⚫ | |||
| + | | {{ItemLink|Iron}} x4 |
||
| + | |- |
||
| + | | {{ItemLink|Extra Large Platform C}} |
||
| + | | {{ItemLink|Resin}} x2<br>{{ItemLink|Iron}} x2 |
||
| + | |- |
||
| + | | {{ItemLink|Extra Large Curved Platform}} |
||
| + | | {{ItemLink|Ceramic}} x2</br>{{ItemLink|Compound}} x2 |
||
| + | |- |
||
| + | | {{ItemLink|XL Extended Platform}} |
||
| + | | {{ItemLink|Resin}} x3 |
||
| + | |- |
||
| + | | {{ItemLink|Figurine Platform}} |
||
| + | | {{ItemLink|Iron}} x4 |
||
| + | |- |
||
| ⚫ | |||
| + | | {{ItemLink|Ceramic}} x2</br>{{ItemLink|Iron}} x2 |
||
| + | |- |
||
| + | | {{ItemLink|Large Rover}} |
||
| + | | {{ItemLink|Rubber}} x2</br>{{ItemLink|Aluminum Alloy}} x2 |
||
| + | |- |
||
| + | | {{ItemLink|Landing Pad}} |
||
| + | | {{ItemLink|Ceramic}} x2</br>{{ItemLink|Aluminum}} |
||
| + | |- |
||
| + | | {{ItemLink|Small Shuttle}} |
||
| + | | {{ItemLink|Aluminum}} x2 |
||
| + | |- |
||
| + | | {{ItemLink|Medium Shuttle}} |
||
| + | | {{ItemLink|Ceramic}} x2</br>{{ItemLink|Aluminum Alloy}} |
||
| + | |- |
||
| + | | {{ItemLink|Large Shuttle}} |
||
| + | | {{ItemLink|Ceramic}} x2</br>{{ItemLink|Titanium Alloy}} x2 |
||
| + | |} |
||
| + | {{Power|consumption=5}} |
||
== Trivia == |
== Trivia == |
||
* Before Patch 1.0, the Large Printer was the Vehicle Bay. Large vehicles and attachments for them were fabricated at the Vehicle Bay, and it also acted as a landing spot for all shuttles, before the introduction of the [[Landing Pad]]. |
* Before Patch 1.0, the Large Printer was the Vehicle Bay. Large vehicles and attachments for them were fabricated at the Vehicle Bay, and it also acted as a landing spot for all shuttles, before the introduction of the [[Landing Pad]]. |
||
| + | * Extra Large items take a long time to print. The time remaining can be based on the number of bits of resource nuggets remaining on the printer. |
||
== Media == |
== Media == |
||
| Line 42: | Line 110: | ||
[[Category:Modules]] |
[[Category:Modules]] |
||
| − | [[Category:Vehicle Bay]] |
||
| − | [[de: |
+ | [[de:Großer Drucker]] |
| + | [[es:Impresora Grande]] |
||
| − | [[fr:Quai des véhicules]] |
||
| − | [[ |
+ | [[fr:Imprimante (grande)]] |
| + | [[ja:大きなプリンター]] |
||
[[ru:Транспортный бокс]] |
[[ru:Транспортный бокс]] |
||
Revision as of 19:01, 24 April 2021
| |
|---|---|
| Details | |
| Tier | Large |
| Group | Item |
| Type | Crafting |
| Crafted at | |
| Recipe | 3x |
| Unlock Cost | Unlocked |
The Large Printer is one of the Tier-3 Modules in Astroneer. It is used to fabricate large and extra large Modules and Vehicles.
Source
| Output | Input | Module |
|---|---|---|
Uses
The Large Printer has the following uses:
- Power Consumption Rate: 5 U/s
Trivia
- Before Patch 1.0, the Large Printer was the Vehicle Bay. Large vehicles and attachments for them were fabricated at the Vehicle Bay, and it also acted as a landing spot for all shuttles, before the introduction of the Landing Pad.
- Extra Large items take a long time to print. The time remaining can be based on the number of bits of resource nuggets remaining on the printer.
Media

The Vehicle Bay, before being replaced with the Large Printer

Large Printer Icon

| ||||||||||||||